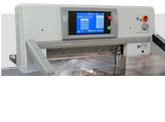
This video gives you a step-by-step overview of our SABER Paper Cutter Auto Knife Adjustment feature that comes standard on all SABER Industrial Paper Cutters, models 45” and above. This revolutionary feature allows the operator to replace and calibrate the knife automatically. This makes knife changes more efficient, calibration quicker and reduces downtime. Contact us for more information.
This is to show the SABER Automatic Knife setting system together with the knife change.
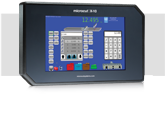
Here you can see us selecting knife change on the normal screen, and then selecting the knife change from the advanced screen of the knife.
Now it gives you pictures to show you what to do when changing the knife.
Removing the bolts, using the lifting device to load the knife up onto the stands using the stands, then putting the knife in the box, and then putting the new or newly sharpened blade in the box back into the stand - lifting it back into the machine using the central lifting device together with the knife key.
This is lifting the knife in now. Then you change the stick. After you’ve changed the stick then the machine will automatically adjust the height of the knife to the first setting which is above the stick.
This is a pre-setting to make sure that the knife will not damage the stick when it loads to the bottom.
This is happening automatically, you will not need to do anything.
Then you push the cut buttons, the knife loads automatically stops at the bottom automatically. Now the final setting takes place, again this is being done automatically by Moses.
You can see here the turnbuckles on each side are adjusting themselves automatically.
This brings the knife down so that it is in perfect contact with the stick, where there is enough pinch to cut through all the way.
Once this is finished, the screen will tell you, OK, now you can put the last two bolts in, send the knife back up, and now you can do a test cut.
So we put some cardstock under the cutting stick, and then we do a test cut.
As a result of the test cut, if everything is good, we can take the box that you’re now going to see, or if we didn’t like the test cut, we can make an adjustment, you see here pushing the down arrow on the left side and this will make the knife adjust four-tenths lower (four thou lower). And if you actually didn’t want that, which we don’t in this case, I can just make it go back up again. You can make these small adjustments and then exit the screen.
It’s also possible, when cutting, to make small adjustments just by touching the knife to the knife that’s cutting down.
If the stick then can set the knife’s adjust screen at the bottom.
You go back to the screen, you can make the small adjustment just as you would when you’re setting the knife.
When you are happy with the adjustments, mark the checkmark and then return by the screen back to the normal cutting process.